Hi all!
As promised, today I’m sharing with you a guest post written by my friend Chery.
Chery’s journey to veganism led her to create her own all natural cosmetics and skincare products. Through using her own products and eating a vegan diet, she cured her own skin condition, and discovered a lot about commercial products along the way. She also makes the facewash and toner for my skincare regime, which I love. Clearly a lady with talent, I’ve told her that she should start selling them, or at least start a blog!
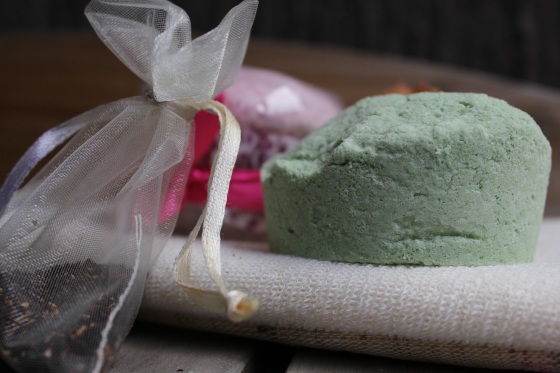
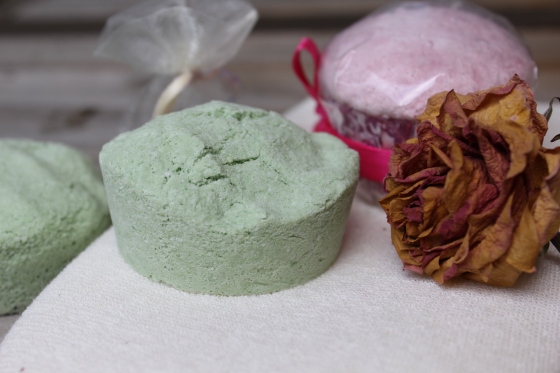
A few weeks ago Chery showed me how to make bath bombs, which are super simple. I’ve asked her to share the recipe here to get you started. All of the ingredients can be bought in the baking aisle at your local supermarket, and the formula is endlessly customisable. They make great stocking-stuffers, kris kringle presents, or just ‘I think you’re wonderful’ presents, which are the best kind of all! If you don’t have a bathtub, find a bowl big enough for your feet, fill it with warm water and drop one of these babies in it for an indulgent treat.
——
When people ask me why I decided to go vegan I always explain that there are three main reasons:
– Ethical: why kill and eat animals, such as pigs and cows, that are intelligent, seek affection and like to have fun, but call your Chihuahua your ‘baby’ and make it wear a little jacket when there is a bit of a breeze?
– Environmental: as I recently found out, a vegan driving a Hummer pollutes less than a meat-eater riding a bike!
– Health: I always knew that meat and dairy were bad for me and had been struggling with acne for many years, as soon as I cut it all out, my skin improved and I never looked back.
I was lucky enough to grow up on the beautiful coast of Brittany in western France where rural activities mingle with beach life. My next door neighbor was a farmer (organic) who played classical music to his cows while milking them. I grew up with pet chooks, ducks, geese and of course cats and dogs. My parents taught me that animals were to be respected and had their own personality. I started questioning why I was one day friends with my chooks, and the next day eating one. My adventure that was going to make me switch to veganism started when I refused to drink milk from the age of 8 (‘it’s for the cow’s baby, not for me!!’) and stopped eating lamb and veal from the age of 10 (after spending a week feeding baby farm animals with the bottle and playing with them all day). Then I couldn’t stand eating red meat as the blood in it would remind me what I was eating. I think for some people it is easy to disconnect their mind from what is in their plate, for me it was just getting harder and harder through years.
I also grew up knowing that there was a plant with healing properties for every illness, whether it was stress or a simple burn. My mum would prepare some mixture of plants and essential oils to help me feel better whenever I was a bit sick, or if I was tired she would prepare different meals with specific herbs and ingredients. To me everything was connected, and I didn’t see the problem with drinking clay as opposed to applying it on my skin, or rinsing my hair with lemon juice to make it brighter and get rid of the shampoo and hairspray residues. All of this made sense so when I started having a closer look at the labels on my cosmetic bottles, it finally clicked that it was time for me to gain some new skills. Just as much as I hated not knowing where my food came from and what it had gone through to end up on my plate, I wanted to know what was behind all the products I was putting on my skin and hair. At the end of the day, tests for carcinogens and any toxic chemicals are made testing the effects of ONE product used on a daily basis…but what about the combination of all these products that I was using. If you take the time to look at all the things you are using, whether you think you use a lot of cosmetics or not, you will not believe how much you expose your skin to toxic products in large quantities once you add it all up. So here I was, taking a soap making class and quickly realising I already knew a lot of the things the teacher was telling us (thanks, mum!). From then I had gained the confidence I needed to start playing crazy scientist in my kitchen.
After all, making my own skincare and cosmetics was perfectly in line with the three main reasons why I went vegan. It is ethical: I test all my products on my friends and on myself, I only use the best plant-based ingredients and no one gets hurt. It is environmentally friendly: there is no greywater resulting from the products I make, all the ingredients are food grade and may as well be used in your next meal. It is healthier: your skin is the largest organ of your body. It absorbs anything you put on it. If you wouldn’t put it in your mouth, don’t apply it on your skin!
My journey started with making soaps with infused rosemary, toners with apple cider vinegar to balance the skin’s pH and moisturizing creams with beautiful macadamia oil and rose water [CAT: For all of which I’ve been a lucky and willing test subject]. It was so much fun, I had to learn more and more. What seemed impossible to do at the time – replacing my make up with something homemade – turned out to be one of the most relaxing and easiest things I have ever done. I tried to use my old foundation the other day and it felt as if I was wearing a clay mask on my face! I now make my own blush, foundation, eyeshadows, eyeliner, mascara… whatever you want me to try and make, you name it, and I will put on my apron and my crazy scientists goggle and go play with my pyrex jars!
But to start nice and easy and have a 100% chance of success, the best thing to make at home is probably bath bombs. Have you ever spent your Saturday afternoon at Lush sniffing all their bath bombs and trying to picture how relaxing and smooth one would be in your bathtub? I have! But you are about to find out how easy and cheap bath bombs are to make at home, and you will have no excuse, as all the ingredients are in the same section of every single supermarket in the country if you don’t already have them in your kitchen! You can make them in a few minutes and create the scents and shapes you want.
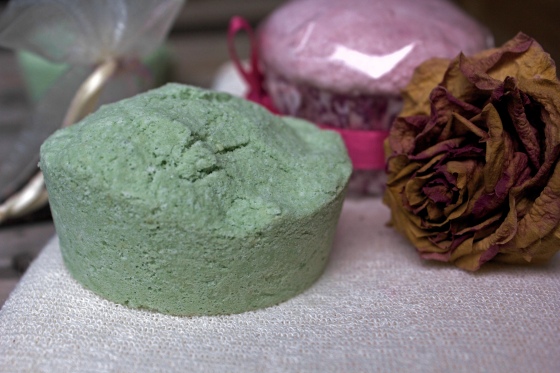
DIY Bath Bombs (makes 12 muffin-sized bombs)
I always find it hard to explain things very simply as cosmetic making is not an everyday kind of recipe. I know the recipe looks complicated, but really, it is only because I am detailing and explaining the process as accurately as possible so you understand why and how, and will be able to adjust the recipe if you see that something is going a bit funny (eg: too much or too little moisture).
You will need:
- (at least) 1 cup bicarb soda
- (at least) ½ cup citric acid
- 1 tsp vegetable glycerine (bicarb soda, citric acid and glycerine are available from the baking section of your local supermarket)
- 1 tsp of non-dairy milk or non-dairy milk powder (this is so the essential oils don’t float on the surface of the water in your bath)
- approx. ½ cup of water in a spray bottle, you won’t use all of it for the recipe (I use rain water collected on my balcony in big jars. It is the most natural filtered water you can find out there and if you are worried about germs and bacteria you can boil the water for 5 min and let it cool down before using it)
Additional ingredients:
- 10 drops of your favourite essential oil (we used a mix of lemon and mint)
- A pinch of oxide powder for colouring (optional) – available from www.heirloombodycare.com.au for a couple of dollars
- 1 tbsp aloe vera gel (optional)
- 1 tsp of almond oil (if you don’t have almond oil, you can use olive oil, the properties for your skin are just as good!)
Method:
- Stir together the bicarb soda and the citric acid in a mixing bowl.
- Add the glycerine and the non-dairy milk or milk powder and stir quickly and well with a wooden spatula or your (clean) hands so the moisture is evenly distributed.
- Add the essential oil and almond oil and any of the other additional ingredients you wish.
- Start spraying the mixture with the spray bottle, a little at a time. Try to crumble the mixture with your (clean) fingers well so it doesn’t get too wet.
- You need to be able to pinch a bit of the mixture and press it in your palm without it going foamy.
- If the mixture is too wet, add some more bicarb soda and citric acid (ratio must always be 1 bicarb soda for ½ citric acid). If the mixture is too dry, spray a little bit more water. It might take you a few goes to get the perfect consistency but that’s the crazy scientist touch to it!
- Once you have the perfect consistency, grab a handful of the mixture with your hand and press it until it looks like a paste.
- Fill moulds up to 2/3 and press well.
Note: we used muffin trays that I use for soap making and bath bombs only. If you are using essential oils or fragrance, do not use a mould that you will be using for cooking or baking after this!
- The bath bombs should start raising like cakes. To speed up the process (as long as your moulds are oven-proof) you can place them in the oven on at a very low temperature for 10/15 min.
- The bath bombs are ready once they are hard and don’t crumble too easily. They can be kept for up to 12 months if they are kept dry, ideally sealed in plastic zip lock bags.
——
Thank you Chery! I love the account of her childhood, what an idyllic place to grow up. I think that it’s wonderful when veganism comes so naturally to people, but at the same time, can understand when it might be a challenge. I think Chery has been very lucky in that way.
I hope you make the bath bombs, and if you do, make sure to let me know how you go. We’ve got a container full of them now, so if you get one for Christmas from Chery or me, don’t act surprised.
On another topic, Cat’s Kitchen was recently chosen as the Friday Feature on Healthy Living Blogs. Check out my interview here. I love Healthy Living Blogs – it’s a network of bloggers who support each other and provide variety and inspiration for every aspect of a healthy life. There’s always something interesting to read, and regular things to get involved in.
With that, I’ll finish up. I hope you all enjoy what’s left of the week!
xx


Great post! I recently made bathbomb cupcakes for lucky friends this holiday. 🙂 I will have to try this recipe next time.
Thank you! I shall pass on your compliments 🙂
That is so cute, I love how adorable they look when set in cupcake papers.